If requested, Walla will send you a Stripe terminal to connect with your Walla account to accept in-studio payments. This guide walks you through everything from physical setup to processing your first transaction.
Step 1: Physical Setup
Before connecting your terminal to Walla, get the hardware ready:
- Install the terminal batteries.
- Note: It takes significant force to open the battery door.
- Connect the terminal to charge using an AC adapter (wall outlet) or USB port.
- Once charged, power on the terminal and wait for it to boot up.
Understanding Terminal Status Labels
The Stripe terminal uses two status labels to indicate its current state:
- Connected: The terminal is online, paired to your system, and ready to accept payments.
- Available: The terminal is connected but not actively processing a payment — it’s awaiting a transaction request.
Note: Don’t worry if the terminal shows “Not Connected” under Business Settings. The terminal connects to Walla when you select Read Card from Terminal at checkout — not passively. It will show “Connected” during an active transaction and return to “Not Connected” once complete. This is expected behavior.
Step 2: Register & Pair Your Terminal in Walla
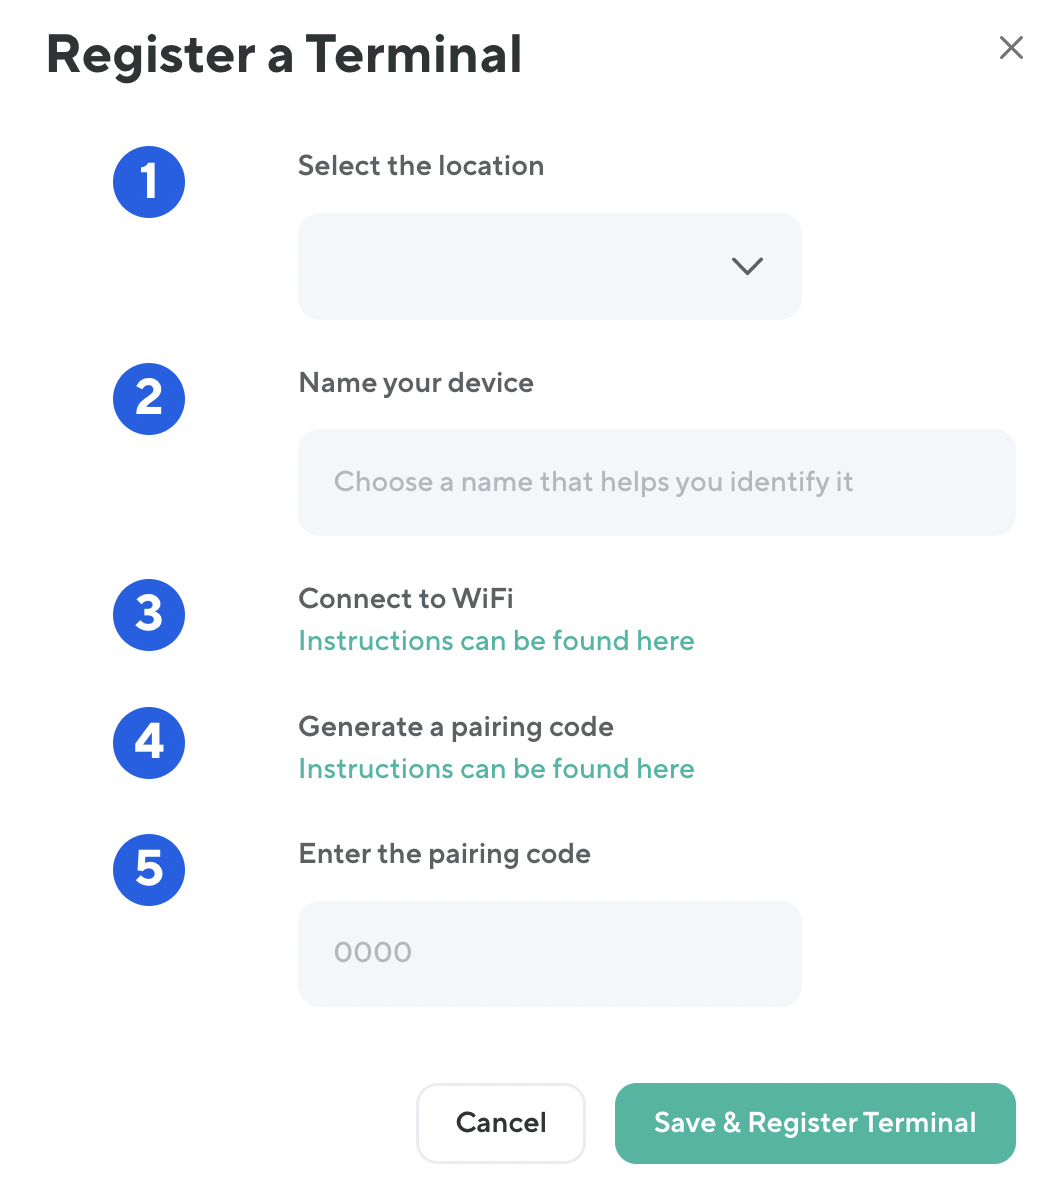
Follow these five steps to register your terminal:
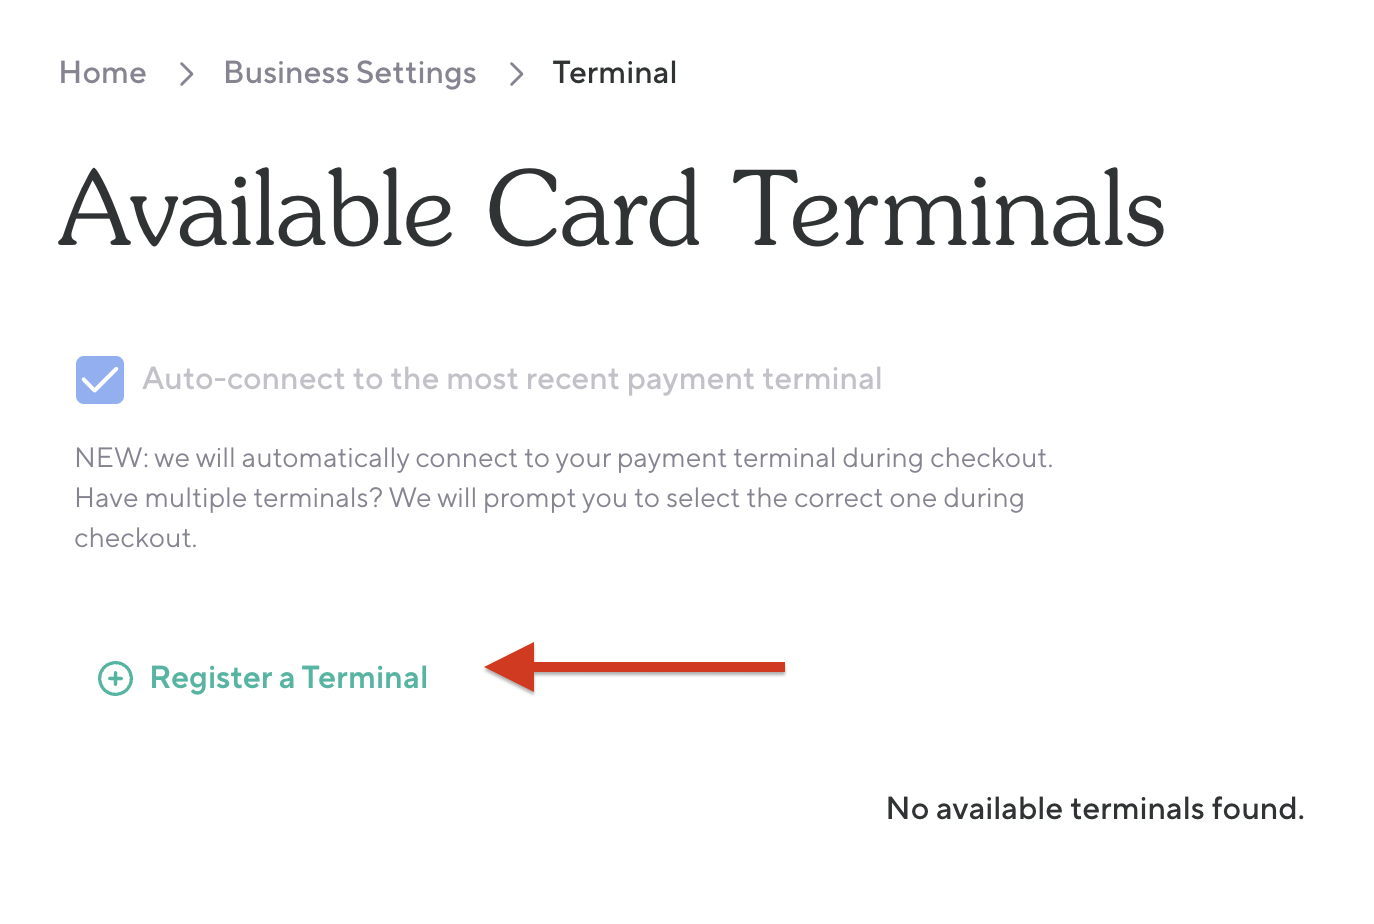
1. Register a Terminal
- Go to Business Settings > Payment Terminal.
- Select Register a Terminal.
- If your business has multiple locations, choose the appropriate location from the drop-down menu. Single-location studios can skip this — the terminal will auto-associate with your default location.
2. Name the Device
Give your terminal a recognizable name (e.g., the location name). This helps you manage multiple devices.
3. Connect to Wi-Fi
Your terminal must connect to the same Wi-Fi network as your studio computer or tablet.
- Swipe right from the left edge of the reader screen to reveal the Settings button.
- Tap Settings and enter the admin PIN: 07139.
- From here, manage your Wi-Fi settings and connect to your network.
4. Generate a Pairing Code
Once connected to Wi-Fi, the terminal may apply updates. After updates complete, a three-word pairing code will appear on the screen.
If the pairing code doesn’t appear: Swipe right from the left edge of the screen, tap Settings, and enter PIN 07139 to manually generate a pairing code.
5. Enter the Pairing Code & Complete Registration
- Enter the three-word pairing code into the Enter the pairing code field in Walla.
- Select Register to complete setup.
The terminal will apply any remaining updates and display a rainbow screen with “Stripe.” It’s now live and ready for payment processing! 🎉
Step 3: Process a Transaction
To use the terminal at checkout:
- Select Buy in the upper right of the Walla dashboard and choose the client and location.
- Fill out the necessary purchase details.
- Select Use Terminal, then scroll down and select the green Collect Payment button.
- The purchase amount will appear on the terminal screen and the customer can complete the sale by tapping, inserting, or swiping their card.
The Stripe terminal only supports IPv4 networks. To confirm your network is compatible, visit i-p.show and check your IP address format.
- IPv4 (supported): 1–3 numbers in 4 sections separated by periods. Examples: 1.2.3.4, 123.214.212.144, 64.82.220.151
- IPv6 (not supported): Uses colons and longer alphanumeric strings. Examples: 2606:4708:10::6816:2868, 2a00:1458:4009:817::200e
If your studio is on an IPv6 network, you’ll need to switch to an IPv4-compatible router or network before the terminal can connect.
Need help? If you run into any issues during setup, our support team is happy to assist. Reach out and we’ll get you up and running.